For starters you will need to remove the Lens cover and the Ballast cover.

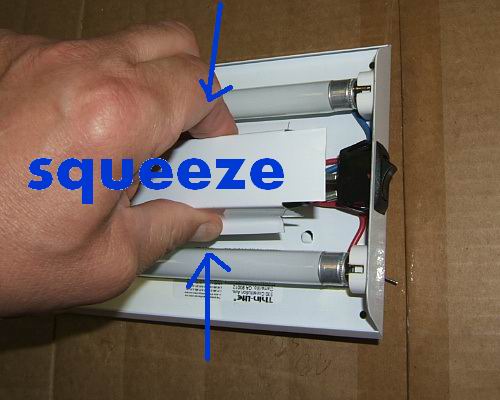
In this demo I removed the Ballast, Wires, and Switch, but you will not have to do that if you don't want to. There is plenty of room for the new switch wires and LED strip's wires between the two arrows. Just cut the wires going to the switch as close to the switch as you can. Then cut the white ground wire coming from the coach about a inch from the ballast.

If your ballast is bad you might as well take it out. It does a much neater job. If you do want to take the Ballast Wires, and Switch out, you will need to take the light down. There are 6 rivets holding the guts in, from the back of the light.
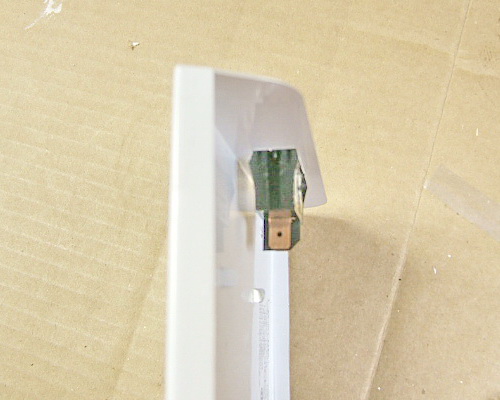
Pictured below, is the side view of the switch that comes with the light. It bulges out to keep it in place. The new switch does the same thing but goes in a lot easier than coming out; unless you know how to do it.

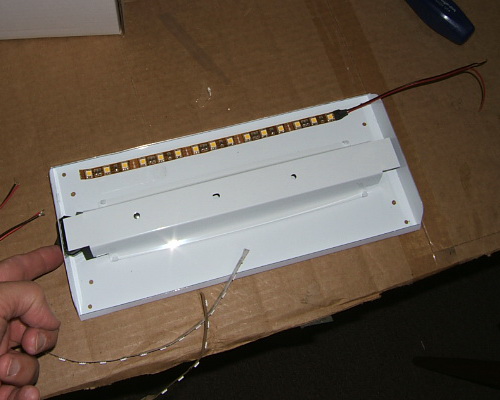
With the old switch out of the way, you can add the new switch.

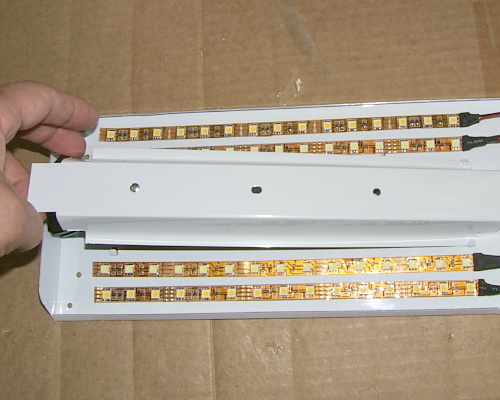
You will now need to put the ballast cover back in place, to use at a template. This will make it easy to see where your strips go.
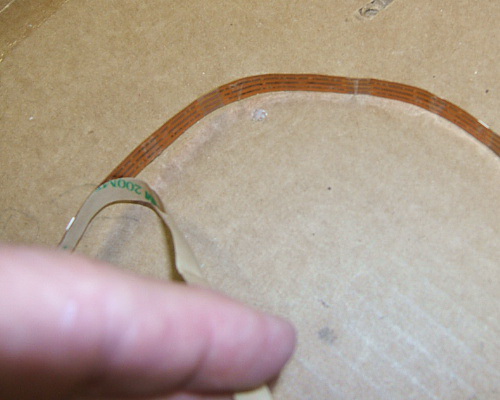
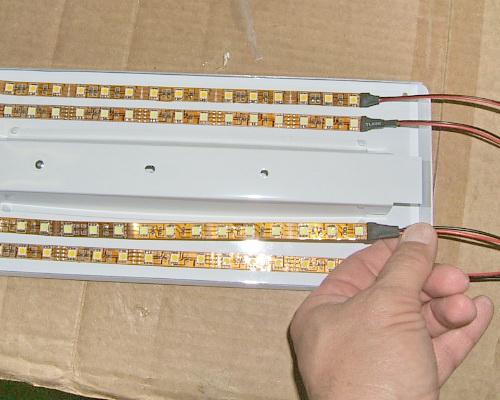
Pull the paper off of the back of the strips (pictured below) and place where you will be able to get two strips on each side.
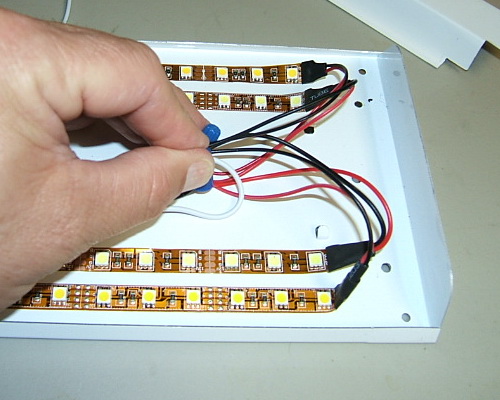
Now you need to take the ballast cover out of the way again. Then you will wire all 4 ground wires (black or black and red) on the LED strips to the white wire coming from your coach which is also ground. The Red wire on the new switch will go to the power coming from the coach.
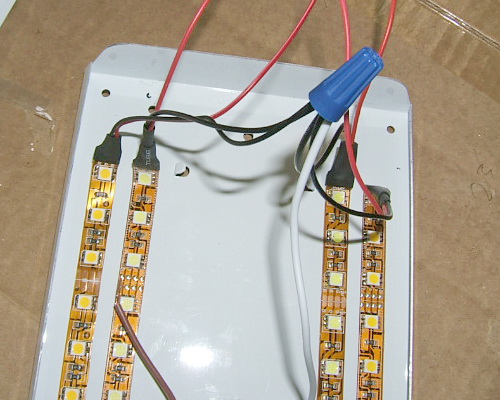
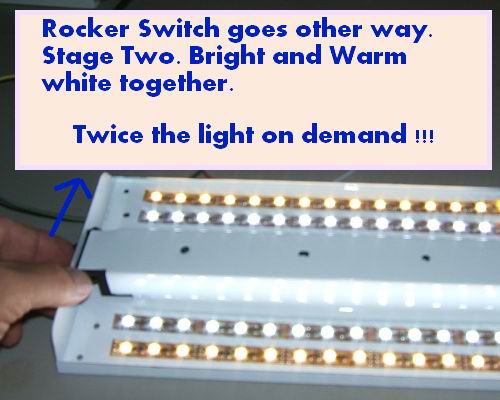
Now it is time to wire the black and brown wires on the NEW switch to the positive side of the LED strips. The two outside wires will be wired together and the two inside wires, wired together. In this demo I am using two Bright White strips and two Warm White strips. The reason I am doing this is it will make it easier to see in this demo, but more importantly it will make it a much better light. When I want more light (all four strips going at one time) I want the Bright White to be the second stage. When I'm relaxing I want the warm white ONLY! When I'm working (cooking or breaking camp) I want bright and warm together. Bright white and Warm white together make for a fuller light spectrum.

To do this you will need to wire the two inside strips to the brown wire coming from the NEW switch. You will notice the two outside strips are hanging loose. Click on the picture for a larger image for this picture and any others.

Now the black wire from the NEW switch goes to the two (+) pos wires on the inside LED strips.
Click on the picture for a larger image for this picture and any others.

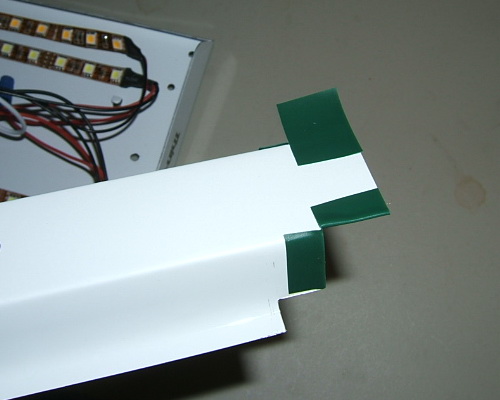
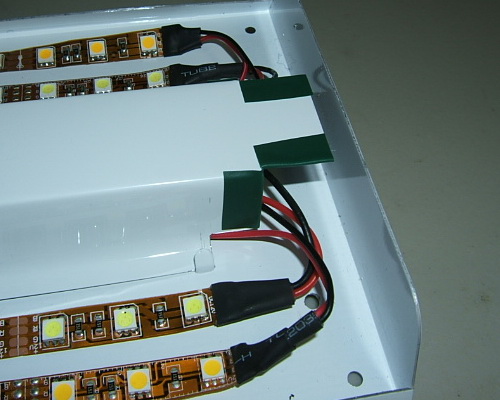
The next step is to put Electrician's tape on the part of the Ballast Cover that might come in contact with the wires over time.
Then you can tuck the wires and put the ballast cover back on.
With the rocker switch allowing power to two of the strips (when flipped one way) and all four strips (when flipped the other way) it is a very nice upgrade for the person who needs more light at different times.

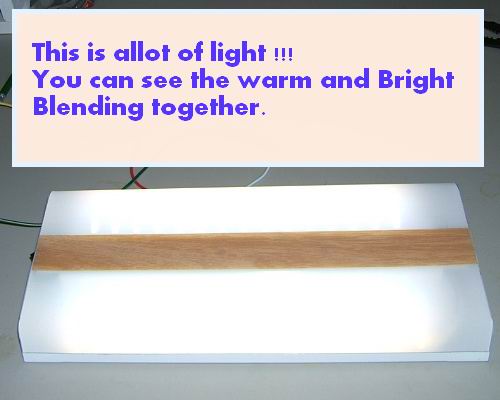
Even though the Warm White strips give more light than the fluorescent lights they replace, some people want and need more light. As some of us know, when we get older more light can be better at times.
Below is the end result. The off white lens defuses the blue tint.
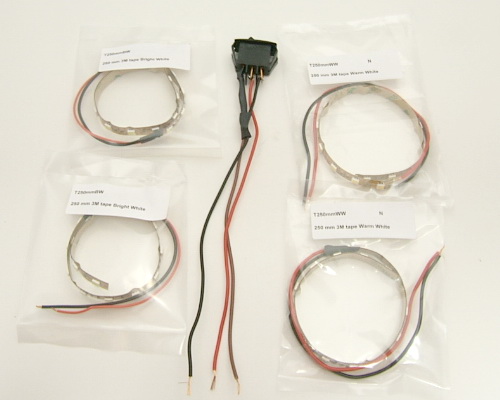
Here is everything that comes in the kit. A directional rocker switch and 4 LED strips.
Some people like one color and others like the another. That is why we offer this kit six different ways.
Click here to see this Warm White kit for the 12 inch light.
Click here to see this Bright White kit for the 12 inch light.
Click here to see this Warm and Bright White kit for the 12 inch light.
Click here to see this Warm White kit for the 18 inch light.
Click here to see this Bright White kit for the 18 inch light.
Click here to see this Warm and Bright White kit for the 18 inch light.
